We often hear customers ask if it is possible to run containers and Kubernetes on Scale Computing HyperCore. The answer is yes! Many of our customers have containerized workloads running on SC//HyperCore today and we expect the adoption to increase over the coming years as more and more application vendors take advantage of the portability provided by containers. The more complex these container-based applications become, the more likely they will be deployed with an orchestration tool such as Kuberentes.
Why run Containers? Containers are wonderful in their ability to provide consistency from one environment to another (e.g. from the developer’s test environment to a VM running on SC//HyperCore!). A container bundles together the entire runtime environment that includes the application, it’s dependencies, libraries/binaries, and the configuration files needed to run it.
Why run Kubernetes? Kubernetes is a widely adopted, open-source orchestration tool used for managing and running containers in production environments. It provides a framework for providing your containers resiliency, networking, load-balancing and scaling.
It is common to see these tools as a part of a larger CI/CD (continuous integration and continuous delivery) pipeline such as in the example below:
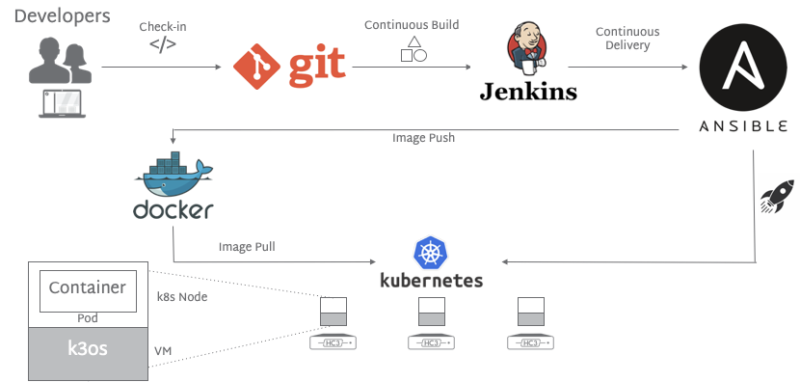
In this post, we will mainly focus on the bottom portion of that CI/CD pipeline showing Kubernetes running containers on SC//HyperCore infrastructure. More specifically, I will walk through an example of running the Sock Shop (a demo app) using Kubernetes on SC//HyperCore with k3os, a lightweight Linux distribution built for the sole purpose of running Kubernetes clusters in edge environments where resources are constrained.
In the scope of this write up, we will:
Create a VM using the k3os distribution,
Initialize Kubernetes within that VM as the Server node for the Kubernetes cluster, and finally,
Install a sample online solution called Sock Shop that runs as containers, to be managed by Kubernetes.
As an example of the type of hardware found in this type of deployment, I’ll be using an HE100 Series cluster with 16GB of RAM, 500GB of NVMe SSD and a Core i3 CPU.

After downloading the k3os iso from the latest release and uploading to the cluster, simply create a new VM in SC//HyperCore selecting that iso.
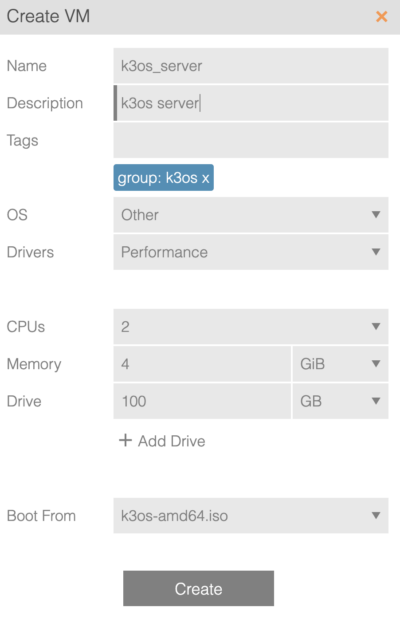
I have named this VM k3os_server as this will act as the server node in this kubernetes cluster providing the control plane components such as the API server, controller-manager, and scheduler. Note that in k3os, the master node can be used to run containers in addition to the control plane.
Start the VM and pull up the console.
At the prompt, log in as rancher with no password.
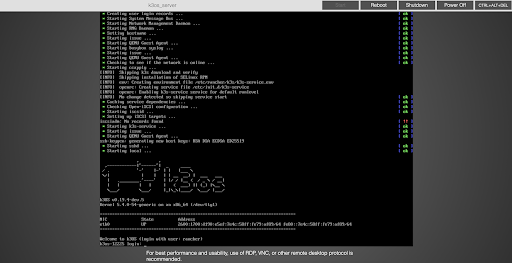
Type sudo k3os install and press <ENTER>.
Type 1 to install to disk.
For my purposes, I set the following for cloud-init (n), using GitHub to SSH (nnn - requires entering a password for the rancher user. Note that selecting yes for SSH with GitHub requires entering the username with the format github:${USERNAME}), and Configure Wifi (n).

Select 1 to run as server and hit <ENTER>.
Provide a cluster secret and Press <ENTER>. We would need this cluster secret when joining a new node as an agent in the k3os cluster (beyond the scope of this post).

Finally, select y and hit enter to format the disk and install with the settings selected.

After the VM reboots, you can now log in as rancher using the password set in the prior steps. Once logged in, type kubectl get nodes <ENTER> to verify that your server node in the master role is up and running.
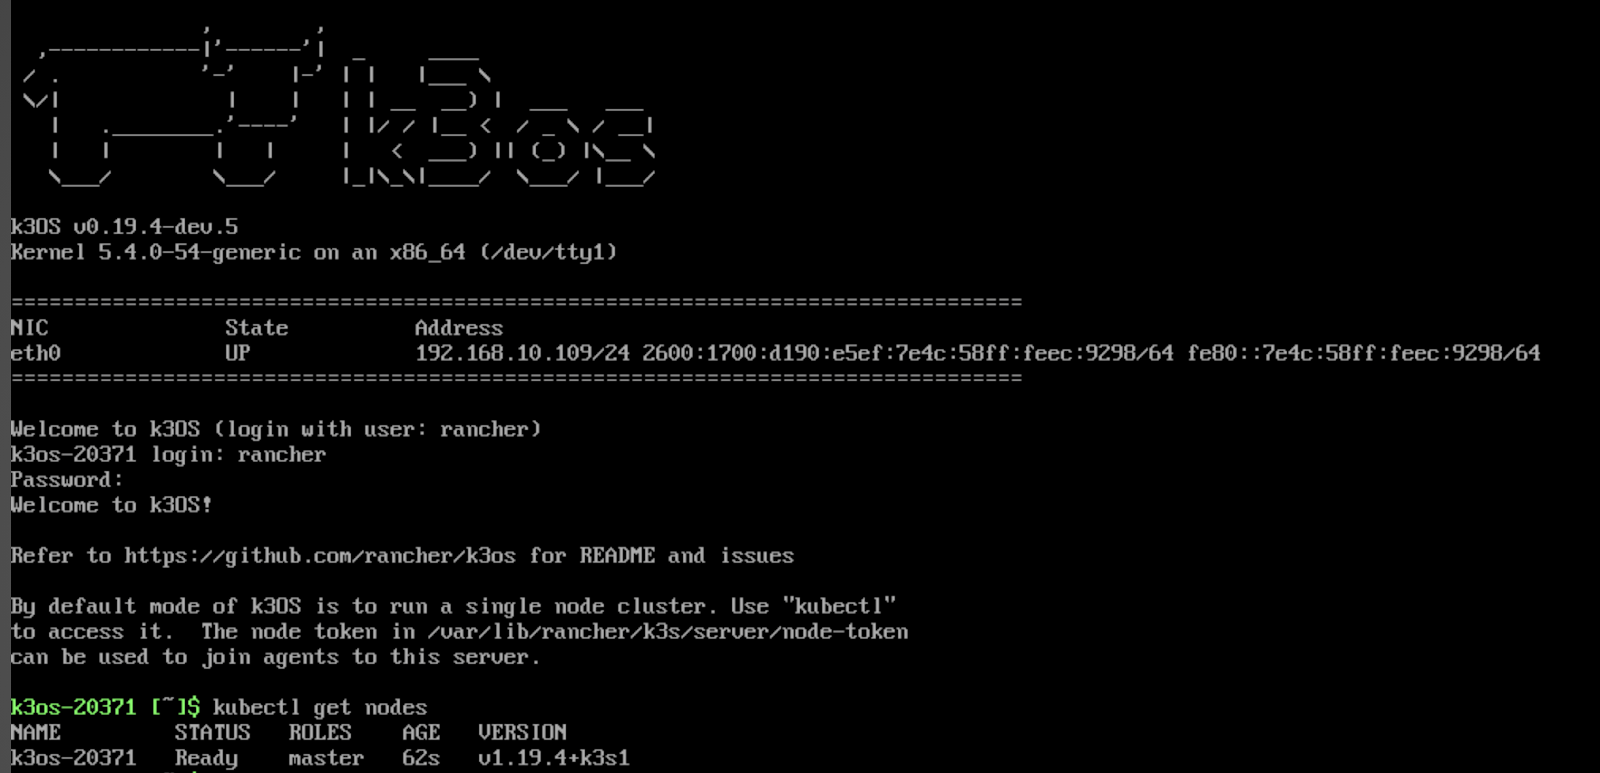
Success! We now have a single node kubernetes cluster and can have some fun running a container-based application. Instead of running a simple “hello world” application we will use the Sock Shop (a fake, but demonstrable online sock shop run on containers) by Weaveworks to show off the power of microservices through just a few commands.
In the following steps, we will create a namespace, then apply the provided yaml manifest (with slight modifications from the github repo) and then create an ingress to access the online shop.
Up first, let’s create the namespace by typing:
kubectl create namespace sock-shop <ENTER>
Without changes, the complete-demo.yaml file from the Sock Shop references a deprecated API, so instead of applying that, we will want to modify the file. First fork the git repo, then update just the complete-demo.yaml file with the contents referenced here:
https://github.com/microservices-demo/microservices-demo/issues/802#issuecomment-648769932
After pushing that change to my own github.com repo, I could then apply it with the following command:
kubectl apply -f https://githubusercontent.com/<github_account>/microservices-demo/master/deploy/kubbernetes/complete-demo.yaml <ENTER>
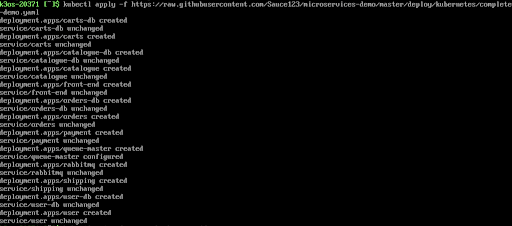
After this completes, you will want to run
kubectl get pods -n sock-shop -o wide <ENTER>

And
kubectl get services -n sock-shop -o wide <ENTER>

Once these are up and running (see status “Running”), we will simply need to create an ingress to access the shop. Add the following:
cat << EOF | kubectl apply -f -
apiVersion: networking.k8s.io/v1beta1
kind: Ingress
metadata:
 name: sock-shop
 namespace: sock-shop
 annotations:
 kubernetes.io/ingress.class: traefik
spec:
 rules:
 - http:
 paths:
 - path: /
 backend:
 serviceName: front-end
 servicePort: 80
EOF
<ENTER>

Then run kubectl get ingresses.networking.k8s.io -n sock-shop <ENTER>

Go to your browser and type in the IP address listed and you will see your newly created online sock shop!

Containers and Kubernetes will continue to see adoption and SC//HyperCore makes a fantastic platform for running those workloads alongside legacy VM applications. This deployment example shows the power of resilient, persistent storage for running Kuberentes in an edge environment.


